Blender Gasket Guide: How to Clean It, Refit It and Know When to Replace It
The small rubber ring that stops leaks, smells and mold, and how to look after it
As an Amazon Associate I earn from qualifying purchases. If you buy through links on this page, we may earn a small commission at no extra cost to you. Details.
If your blender has a removable blade assembly, there’s a small rubber ring hiding underneath it: the gasket (also called a sealing ring or O-ring). It’s easy to forget about, until your blender starts leaking, smelling funny, or growing something you’d rather not see.
The gasket is one of the most important parts of your blender. It stops liquid escaping, keeps food out of the blade bearing, and protects the motor underneath. The good news is that it’s easy to clean and cheap to replace.
This guide shows you how to remove and clean the gasket, deal with mold and odors, refit it correctly, and recognize when it’s time for a new one.
Safety first: Unplug the blender and remove the jar from the base before taking anything apart. Handle the blade assembly by its base. The blades are sharp.
Does your blender have a gasket?
- Most conventional countertop blenders with a screw-on collar at the bottom of the jar have a removable gasket.
- Many personal (bullet) blenders have a gasket inside the blade base that screws onto the cup.
- Many high-performance blenders have the blade assembly built into the jar with internal seals that aren’t meant to be removed by the owner.
Check your manual. It will show whether your gasket is removable and how to take it out.
Why the gasket matters
- Stops leaks. It seals the gap between the jar and the blade assembly. A missing, twisted or worn gasket is the number-one cause of leaks. See how to fix a blender leaking from the bottom.
- Keeps food out of hidden spaces. When it’s seated properly, liquid and food stay in the jar instead of creeping under the blade assembly.
- Protects the motor base. Liquid dripping into the base can damage the motor.
How to remove and clean the gasket
Aim to do this every week or two if you use your blender daily, or whenever you notice a smell or residue.
- Unplug the blender and take the jar off the base.
- Unscrew the collar at the bottom of the jar (or the blade base on a personal blender).
- Lift out the blade assembly carefully by its base.
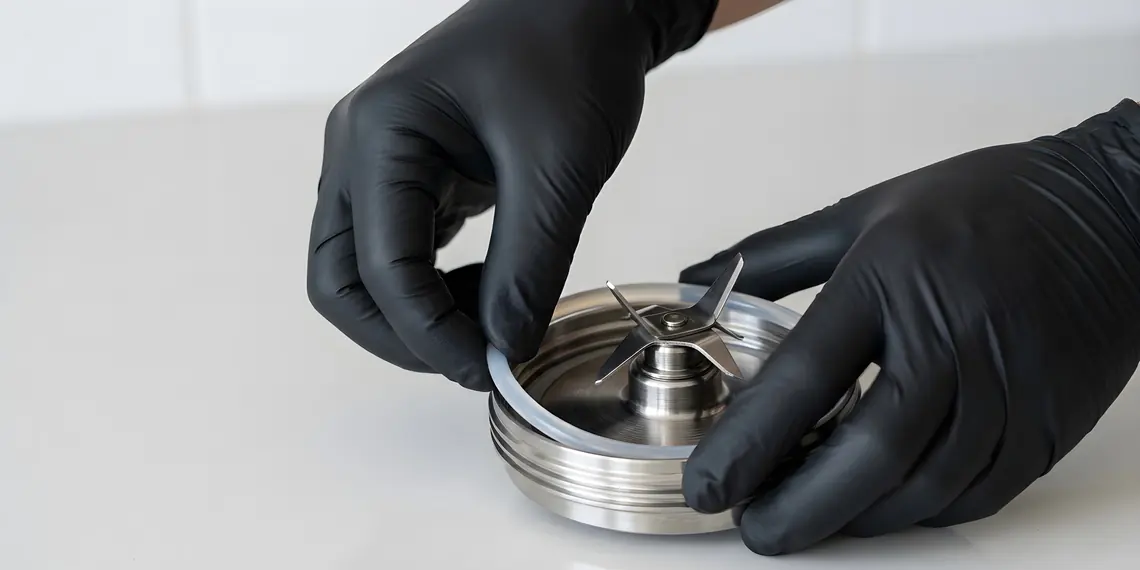
- Remove the gasket. Lift one edge with your fingernail or a blunt tool like the tip of a butter knife. Don’t use anything sharp that could nick the rubber.
- Wash the gasket in warm, soapy water. Rub it between your fingers to remove film, especially in any grooves.
- Clean the groove it sits in, and the underside of the blade assembly, with a small brush or cotton swab.
- Rinse everything and let it air-dry completely before reassembling. Trapped moisture encourages mold and smells.
Dishwasher? Some gaskets are dishwasher-safe (usually top rack). Others can warp or harden with heat. Check your manual.
For everyday cleaning between deep cleans, the quick self-clean method in our 60-second blender cleaning guide keeps residue from building up.
How to get rid of mold on a blender gasket
Black or pink spots on the gasket are usually mold or mildew, caused by food residue and moisture trapped under the blade assembly.
- Remove the gasket and wash it in hot, soapy water.
- Soak it in a mix of equal parts white vinegar and warm water for 15–30 minutes, then scrub gently with a soft brush.
- For stubborn spots, make a paste of baking soda and water, rub it in, and rinse.
- Rinse thoroughly and dry completely.
If the stains don’t come out, or the rubber is pitted, replace the gasket. It’s inexpensive, and mold can live in tiny cracks you can’t clean.
Avoid harsh cleaners that can degrade rubber, and never mix cleaning chemicals, especially bleach with vinegar or ammonia, which can release dangerous fumes. For general guidance on keeping kitchen surfaces clean and safe, see FoodSafety.gov.
How to get rid of smells
Rubber can absorb strong smells like garlic, onion and protein powder.
- Soak the gasket in warm water with a tablespoon of baking soda for 30 minutes.
- Dry it in fresh air or sunlight for a few hours.
- Store the blender jar with the lid off so it can air out.
If the smell comes back quickly, the gasket may be worn and porous. Time for a new one.
How to refit the gasket correctly
Most leaks after cleaning come from a gasket that’s been put back wrong.
- Place the gasket flat and evenly in its groove, with no twists, folds or bulges.
- Check it’s the right way up. Some gaskets are slightly beveled or have a lip. Match the orientation shown in your manual.
- Set the blade assembly in place, then screw the collar on straight and tighten firmly by hand. Don’t use tools.
- Test for leaks. Fill the jar one-third with water and stand it on a dry paper towel for a few minutes before blending.
Most “my blender suddenly leaks” problems are a gasket that’s missing, twisted or put back upside down.
When to replace your blender gasket
Replace the gasket if you notice:
| Sign | What it means |
|---|---|
| Leaks even when fitted correctly | The seal has flattened or stretched |
| Cracks, nicks or tears | The rubber is damaged |
| Hard, stiff or brittle rubber | It has aged or been heat-damaged (often from the dishwasher) |
| Wavy or loose in its groove | It has stretched out of shape |
| Stains or mold that won’t wash out | Mold may be living in the rubber |
| A smell that comes back quickly | The rubber has become porous |
Many people replace gaskets every year or so with daily use, but check the condition regularly rather than relying on a schedule.
How to buy the right replacement gasket
- Find your model number, usually on a sticker under the motor base.
- Buy a gasket listed as compatible with that exact model. “Nearly right” sizes don’t seal.
- Check the manufacturer’s parts pages first, for example Oster, Hamilton Beach and Ninja.
- Consider buying two so you always have a spare.
Frequently asked questions
How often should I clean my blender gasket?
Every week or two with daily use, or whenever you notice a smell, residue or a leak. Rinse the jar straight after use in between.
Can I put my blender gasket in the dishwasher?
Some are dishwasher-safe on the top rack, but heat can harden or warp others. Check your manual. Hand washing in warm, soapy water is the safest option.
How do I get mold off my blender gasket?
Wash it in hot, soapy water, soak it in equal parts vinegar and warm water, scrub gently and dry it completely. If stains or pitting remain, replace the gasket.
Why is my blender still leaking after I replaced the gasket?
Check that the gasket is flat, untwisted and the right way up, and that the collar is screwed on straight and tight. If it leaks from the center under the blades, the blade seal may be worn instead.
How long does a blender gasket last?
It depends on use and cleaning. Many people replace it about once a year with daily use. Replace it sooner if it’s cracked, stiff, stretched or moldy.
The bottom line
The gasket is a tiny part with a big job. Remove and clean it regularly, dry it completely, refit it flat and the right way up, and replace it when it’s worn or moldy. Your blender will leak less, smell fresher and last longer.
Dealing with a cloudy jar too? See how to clean a cloudy blender jar.

We research blenders so you don't have to: we compare specs, warranties and thousands of owner reviews, and write practical guides for getting more out of the blender you already have.