How to Make Nut Butter in a Blender (Without Burning Out the Motor)
Step-by-step peanut, almond and cashew butter, plus which blenders can handle it
As an Amazon Associate I earn from qualifying purchases. If you buy through links on this page, we may earn a small commission at no extra cost to you. Details.
Homemade nut butter is one of the most satisfying things you can make in a blender. It needs just one ingredient, costs less than many store-bought jars, and you control exactly what goes in: no added sugar, palm oil or preservatives unless you want them.
But nut butter is also one of the toughest jobs you can give a blender. The mixture gets extremely thick before it turns creamy, and that’s exactly the kind of work that can overheat a motor.
This guide shows you how to make nut butter in a blender step by step, which blenders can handle it, how to fix the common problems, and a few flavor ideas to try.
Allergy note: Nut allergies can be severe. If you make nut butter in a blender that’s also used for others’ food, clean it thoroughly afterward, and label your jars clearly.
Can your blender make nut butter?
Honestly, it depends on your blender.
| Blender type | Nut butter? | Notes |
|---|---|---|
| High-performance with tamper (e.g. Vitamix, Blendtec) | Yes, the best option | The tamper keeps nuts moving into the blades |
| Food processor | Yes, very good | Slower, but a classic way to make nut butter |
| Full-size conventional | Maybe | Possible in small batches with patience; risk of overheating |
| Personal / bullet | Usually not | Some have a milling blade for small amounts; check the manual |
Check your manual before you start. Some manuals specifically mention nut butter and give a recipe. Others warn against very thick mixtures. You’ll usually find the manual on the manufacturer’s site, for example Vitamix or Blendtec.
If you don’t have a high-performance blender, a food processor is often the easier tool for nut butter. See our comparison of blenders vs. food processors.
What you need
- 2–3 cups of nuts. Too few and the blades can’t reach them; too many and the motor struggles. Many high-performance blender recipes use around 2–3 cups. Check your manual.
- Salt (optional): about ¼ teaspoon per 2 cups of nuts, to taste.
- Oil (optional): 1–2 teaspoons of a neutral oil, if your nuts are dry.
- Sweeteners or flavors (optional): honey, maple syrup, cinnamon, vanilla, cocoa.
Best nuts to start with: Peanuts and cashews are the easiest because they’re naturally oily and soft. Almonds are harder and take longer. Hazelnuts, pecans and walnuts all work too.
Step 1: Roast the nuts (don’t skip this)
Roasting makes a huge difference. Warm nuts release their oils much faster, which means creamier nut butter, less blending time, and less strain on your motor. Roasting also deepens the flavor.
- Heat your oven to about 350°F (175°C).
- Spread the nuts in a single layer on a baking sheet.
- Roast for 8–12 minutes, stirring halfway, until fragrant and lightly golden. Watch closely, because nuts burn quickly.
- Let them cool for about 5 minutes. You want them warm, not hot, when they go in the blender.
Already-roasted nuts from the store can be warmed for 5 minutes to get the same benefit.
Step 2: Blend in stages
Nut butter goes through several stages. Knowing them stops you giving up too early.
- Add the warm nuts to the jar. Don’t add liquid.
- Start on low, then increase to medium-high or the speed your manual recommends.
- Use the tamper constantly (high-performance blenders), pressing the nuts into the blades.
You’ll see:
- Stage 1, crumbs (first 30 seconds): The nuts break down into coarse crumbs, like breadcrumbs.
- Stage 2, thick paste (about 1 minute): The crumbs clump into a thick, dry ball or paste. This is the hardest stage for the motor.
- Stage 3, loosening (1–2 minutes): The oils release and the paste starts to flow.
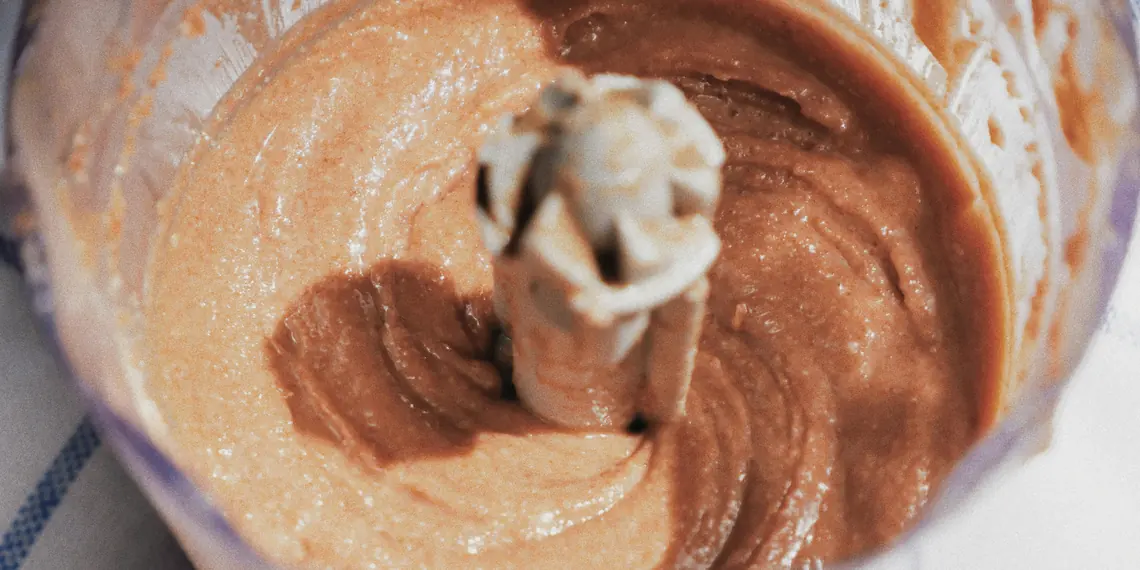
- Stage 4, creamy and smooth: The nut butter becomes glossy and pourable.
In a high-performance blender this usually takes 1–3 minutes. In a food processor it can take 8–15 minutes with regular scraping. Times vary by nut and machine.
Step 3: Take breaks to protect your motor
This is the key to not overheating your blender:
- Blend in short bursts of 30–60 seconds.
- Stop, unplug and scrape down the sides with a spatula between bursts.
- If the base feels hot or you smell something hot, stop and let it cool for several minutes. If a burning smell appears, see why a blender smells like burning.
- If your blender shuts off by itself, its thermal protection has kicked in. Unplug it and let it cool completely before continuing.
Step 4: Season and finish
Once the nut butter is smooth:
- Add salt and blend for a few seconds.
- Add sweetener or flavorings and blend briefly. Add honey or maple syrup at the very end and in small amounts, as too much can make the nut butter seize up and turn stiff.
- Taste and adjust.
Troubleshooting nut butter
| Problem | Why it happens | Fix |
|---|---|---|
| Stuck at the crumb stage | Nuts are cold, or not enough of them for the blades | Roast or warm the nuts; add more nuts; use the tamper |
| Thick paste won’t loosen | Normal stage 2, or nuts are dry | Keep going in short bursts; add 1–2 tsp neutral oil |
| Blades spin in an air pocket | Mixture too thick to circulate | Stop, scrape down, use the tamper. See blender not blending |
| Motor hot or smells | Overworking the motor | Stop and let it cool; blend in shorter bursts |
| Seized up after adding honey | Liquid sweetener stiffened the mixture | Add a little oil and blend briefly; add less sweetener next time |
| Grainy texture | Not blended long enough (common with almonds) | Blend longer in short bursts |
Warm nuts, short bursts and a tamper: that’s the difference between creamy nut butter and a hot, struggling motor.
Flavor ideas
- Honey roasted peanut butter: Peanuts, salt and a drizzle of honey at the end.
- Cinnamon almond butter: Almonds, a pinch of salt, ½ teaspoon cinnamon and a little maple syrup.
- Chocolate hazelnut spread: Roasted, skinned hazelnuts, cocoa powder, a little powdered sugar and vanilla. Add a splash of oil if needed.
- Maple pecan butter: Pecans, maple syrup and a pinch of salt.
- Cashew coconut butter: Cashews with a handful of unsweetened shredded coconut.
- Mixed nut butter: Use up leftover nuts. Mix peanuts or cashews with harder nuts for an easier blend.
How to store homemade nut butter
Homemade nut butter has no preservatives, so store it with care:
- Use a clean, airtight jar.
- Refrigerate for the longest freshness. Natural nut butters can go rancid faster at room temperature because of their natural oils. Many people keep homemade nut butter in the fridge and use it within a few weeks to a couple of months. It firms up when cold, so let it soften before spreading.
- Oil separation is normal. Just stir it back in.
- Throw it out if it smells sour, bitter or “off”, or shows any mold.
- Always use a clean spoon to avoid introducing moisture or crumbs.
For general food storage guidance, see FoodSafety.gov.
Cleaning your blender after nut butter
Nut butter is sticky, but it’s easy to clean if you do it straight away:
- Scrape out as much as you can with a flexible spatula.
- Add warm water and a drop of dish soap, and blend for 30–60 seconds.
- Repeat if needed, then rinse and dry.
Our 60-second blender cleaning guide has more tips, including how to deal with lingering smells.
Bonus trick: Before cleaning, make a smoothie in the “dirty” jar. The leftover nut butter adds flavor, and cleanup is easier afterward. Try one of our banana-free smoothie recipes.
Tools that make nut butter easier
Frequently asked questions
Can you make nut butter in a regular blender?
Sometimes, in small batches, with warm roasted nuts, short bursts and lots of scraping. Many conventional blenders struggle and can overheat, though. A high-performance blender with a tamper or a food processor is much easier.
Why won’t my nut butter get creamy?
Usually the nuts are cold or dry, you haven’t blended long enough to get past the thick paste stage, or there aren’t enough nuts for the blades to reach. Roast the nuts, blend in short bursts, scrape down often, and add 1–2 teaspoons of neutral oil if needed.
Do I need to add oil to make nut butter?
Usually not. Nuts contain enough natural oil, especially peanuts and cashews. Drier nuts like almonds sometimes benefit from a teaspoon or two of neutral oil.
How long does homemade nut butter last?
It’s best kept in an airtight jar in the fridge, where many people use it within a few weeks to a couple of months. Throw it out if it smells sour, bitter or off.
Is homemade peanut butter cheaper than store-bought?
It can be, especially if you buy nuts in bulk. More importantly, you control the ingredients, with no added sugar or oils unless you choose them.
The bottom line
Homemade nut butter is easy with the right technique: roast the nuts, blend them warm, work in short bursts, and scrape down often. A high-performance blender with a tamper or a food processor makes it much easier, while a conventional blender needs extra patience and small batches. Listen to your motor, give it breaks, and you’ll have creamy nut butter in minutes.
Next, find out which type of blender is best for your kitchen.

We research blenders so you don't have to: we compare specs, warranties and thousands of owner reviews, and write practical guides for getting more out of the blender you already have.